Google Chromecast: Difference between revisions
No edit summary |
No edit summary |
||
| Line 43: | Line 43: | ||
* [http://www.ifixit.com/Teardown/Chromecast+Teardown/16069/1| A great teardown] of the Google Chromecast by ifixit.com is available for disassembling the device. | * [http://www.ifixit.com/Teardown/Chromecast+Teardown/16069/1| A great teardown] of the Google Chromecast by ifixit.com is available for disassembling the device. | ||
== Bootloader Exploit Package == | |||
'''Items Needed:''' | |||
* Blank USB Flash drive (at least 128MB) –Your drive will be erased– | |||
* Our USB Image | |||
* Google Chromecast | |||
* Powered Mini USB OTG Cable | |||
* If not a Powered Mini USB OTG Cable, then a way to rig up a cable that does just this. We will not provide instructions, it’s simple, but still. Just buy the cable. | |||
'''Pre-Setup:''' | |||
# Install our USB image as a whole to your USB flash drive with dd: | |||
<code>Syntax: dd if=GTVHacker-Chromecast.img of=/dev/sdX bs=1024</code> | |||
'''Root Process:''' | |||
# Plug the flash drive into one female “A” end of the USB OTG cable | |||
# Plug the other end into the Chromecast | |||
# Hold down the button on the Chromecast while plugging in the power cord. | |||
# Watch the screen, and any blinking light on your flash drive. The Chromecast will power up, execute our unsigned kernel, kick off to a script that replaces /system with a rooted one. It will then wipe /data, and reboot back to the normal system. All of this should take about a minute. Don’t unplug anything while it is installing. | |||
# When it is complete, your box will reboot, and you will see a new splash screen, and then the Setup screen. Just re-set up your Chromecast, and you can telnet to get a root shell on your Chromecast on port 23! | |||
== Gallery == | == Gallery == | ||
Revision as of 07:19, 28 July 2013
"Although the information we release has been verified and shown to work to the best our knowledge, we cant be held accountable for bricked devices or roots gone wrong."

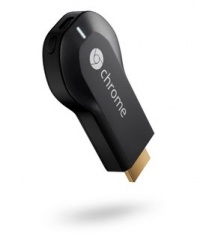
This page will be dedicated to the hardware specifications, descriptions, and information related to the Google Chromecast (H2G2-42).
Purchase
Buying devices is expensive and, in a lot of cases our testing leads to bricked equipment. If you would like to help support our group, site, and research please use one of the links below to purchase your next device.
Purchase the Google Chromecast at Amazon
Specs
- Azure Wave AW-NH387 - 802.11 b/g/n WLAN, Bluetooth, FM combo module IC
- Marvell 88DE3005 (DE3005-A1)
- Micron 29F16G08CBACA (2GiB Flash NAND)
- Micron 3FE77D9PXV (512MB RAM)
CPU Info
The following info has been pulled from /proc/cpuinfo on the Chromecast.
Processor       : ARMv7 Processor rev 0 (v7l)
BogoMIPS        : 1594.16
Features        : swp half thumb fastmult vfp edsp thumbee neon vfpv3
CPU implementer : 0x41
CPU architecture: 7
CPU variant     : 0x3
CPU part        : 0xc09
CPU revision    : 0
Hardware        : MV88DE3100
Revision        : 0301
Serial          : 0000000000000000
Software
At its core Google Chromecast is Android. Items below can be found that help describe the Chromecast operating environment.
- Chromecast Build.prop - A build.prop that details all the config props setup on the device in its shipped configuration.
UART
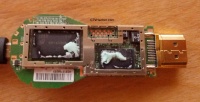
After taking the Google Chromecast apart and also removing the shielding, you receive access to a 17 point unpopulated pad. This pad contains an RX, TX and GND for UART. Currently this only displays console output from the initial boot process.
- Settings: 115200 8n1
- Console Out: Log
 |
- A great teardown of the Google Chromecast by ifixit.com is available for disassembling the device.
Bootloader Exploit Package
Items Needed:
- Blank USB Flash drive (at least 128MB) –Your drive will be erased–
- Our USB Image
- Google Chromecast
- Powered Mini USB OTG Cable
- If not a Powered Mini USB OTG Cable, then a way to rig up a cable that does just this. We will not provide instructions, it’s simple, but still. Just buy the cable.
Pre-Setup:
- Install our USB image as a whole to your USB flash drive with dd:
Syntax: dd if=GTVHacker-Chromecast.img of=/dev/sdX bs=1024
Root Process:
- Plug the flash drive into one female “A” end of the USB OTG cable
- Plug the other end into the Chromecast
- Hold down the button on the Chromecast while plugging in the power cord.
- Watch the screen, and any blinking light on your flash drive. The Chromecast will power up, execute our unsigned kernel, kick off to a script that replaces /system with a rooted one. It will then wipe /data, and reboot back to the normal system. All of this should take about a minute. Don’t unplug anything while it is installing.
- When it is complete, your box will reboot, and you will see a new splash screen, and then the Setup screen. Just re-set up your Chromecast, and you can telnet to get a root shell on your Chromecast on port 23!


